Creating a Monitoring List
With a huge amount of monitored components and thousands of new notifications each year, not all the information within the Vilocify Portal is of interest to every single user.
Monitoring lists allow to filter only relevant information by allowing Vilocify users to select specific components they want to actually monitor. Typically, a monitoring list represents a specific product the user is responsible for (containing all the libraries, runtimes, frameworks, etc. used for that product) or a specific infrastructure asset (containing components representing hardware, operating system, installed applications, etc.). Whenever new relevant information is published, subscribers of the list will be alerted via a notifications email, i.e. a user-specific mail sent once daily, with all new notifications affecting a user's monitoring list.
Start the Monitoring List creation
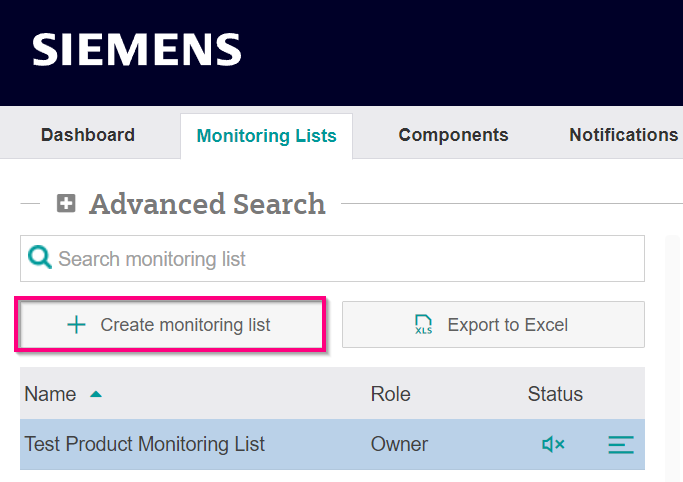
To start the creation of a monitoring list, visit the monitoring list tab of the Vilocify Portal (you might be asked to log in first) and then click on the "Create Monitoring List" button in the upper left corner (see screenshot below).
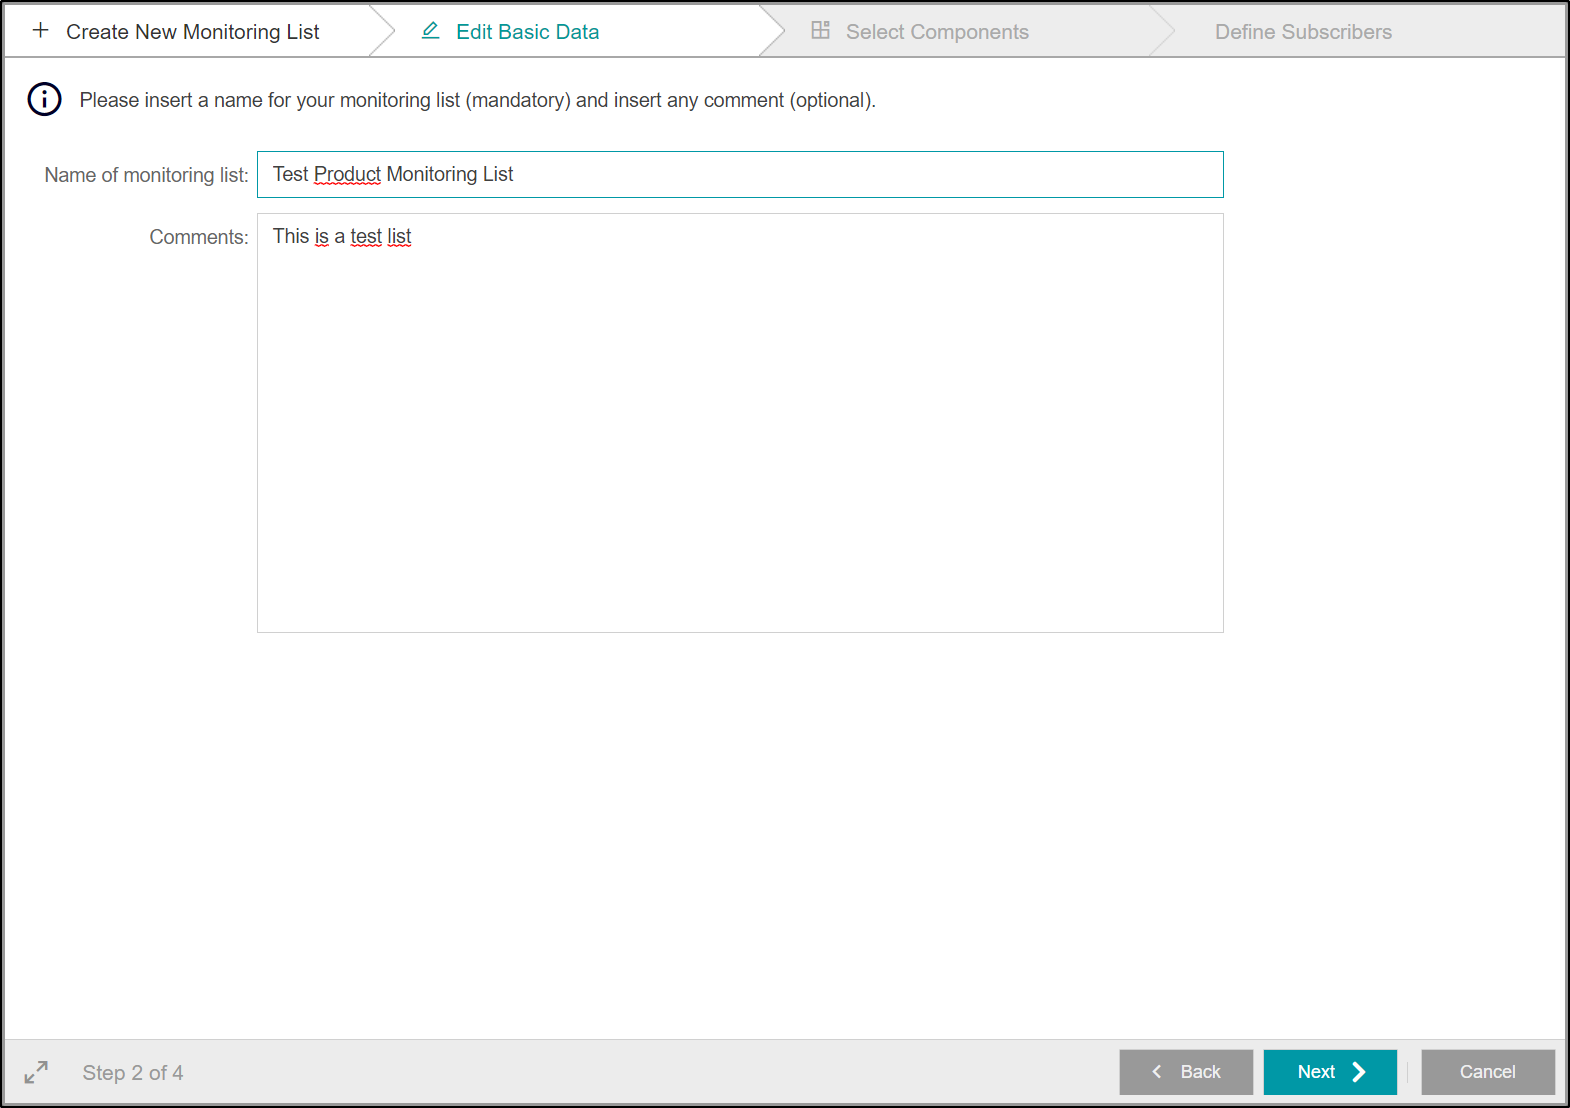
Step 1: Edit Basic Data
In the first step of the creation process you need to provide some basic information about your monitoring list:
- Name (mandatory): this is the name that will be displayed in the monitoring list table within the Vilocify Portal. Monitoring list names do not need to be unique, but we encourage you to give them descriptive names, e.g. reflecting the name of the product or IT asset the list represents.
- Comment (optional): you can add additional comments to a monitoring list, which will be shown to its subscribers.
Once you have filled the mandatory and optional elements as desired, click on the "Save" button on the bottom right of the window.
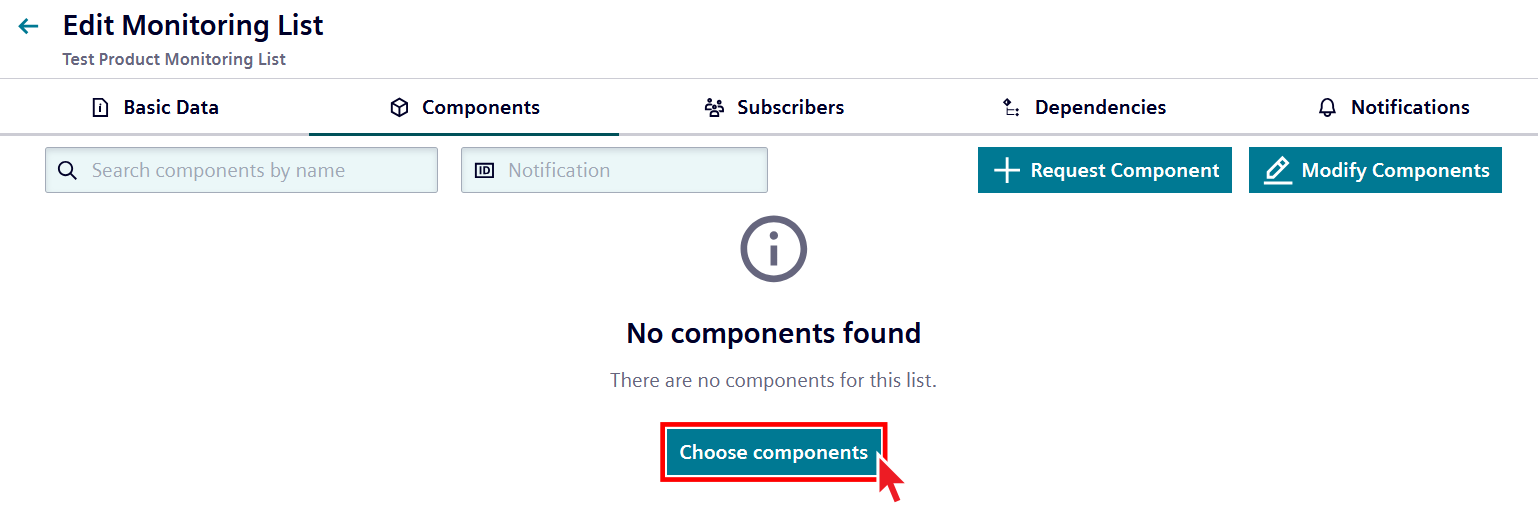
Step 2: Select Components
You are now able to select all the components you wish to monitor, e.g. reflecting all used third-party components within a product you are responsible for, software running on an application server you manage, or IT assets within your own infrastructure. Whenever a new notification is published for a monitored component, you will be alerted via notification email.
To add or modify components, click on the Modify Components button as shown in the Screenshot. It will open the Select components overview in which you can edit your monitored components.
- Search for the desired component via the search field on the top left
- Check the box to the left of the component to select it
- If you cannot find the desired component, try using different search terms. If you still cannot find it, click on the "Request Component" under the search area, to place a component request. Please note that each component request has to be analyzed by the Vilocify team, as such the requested component will not be immediately available to be added to your list. Once your component request is processed, you will be informed via email, and you can then add it to your monitoring list.
Once you have added (or requested) all the desired components to your list, click on the "Save" button on the bottom right of the window.

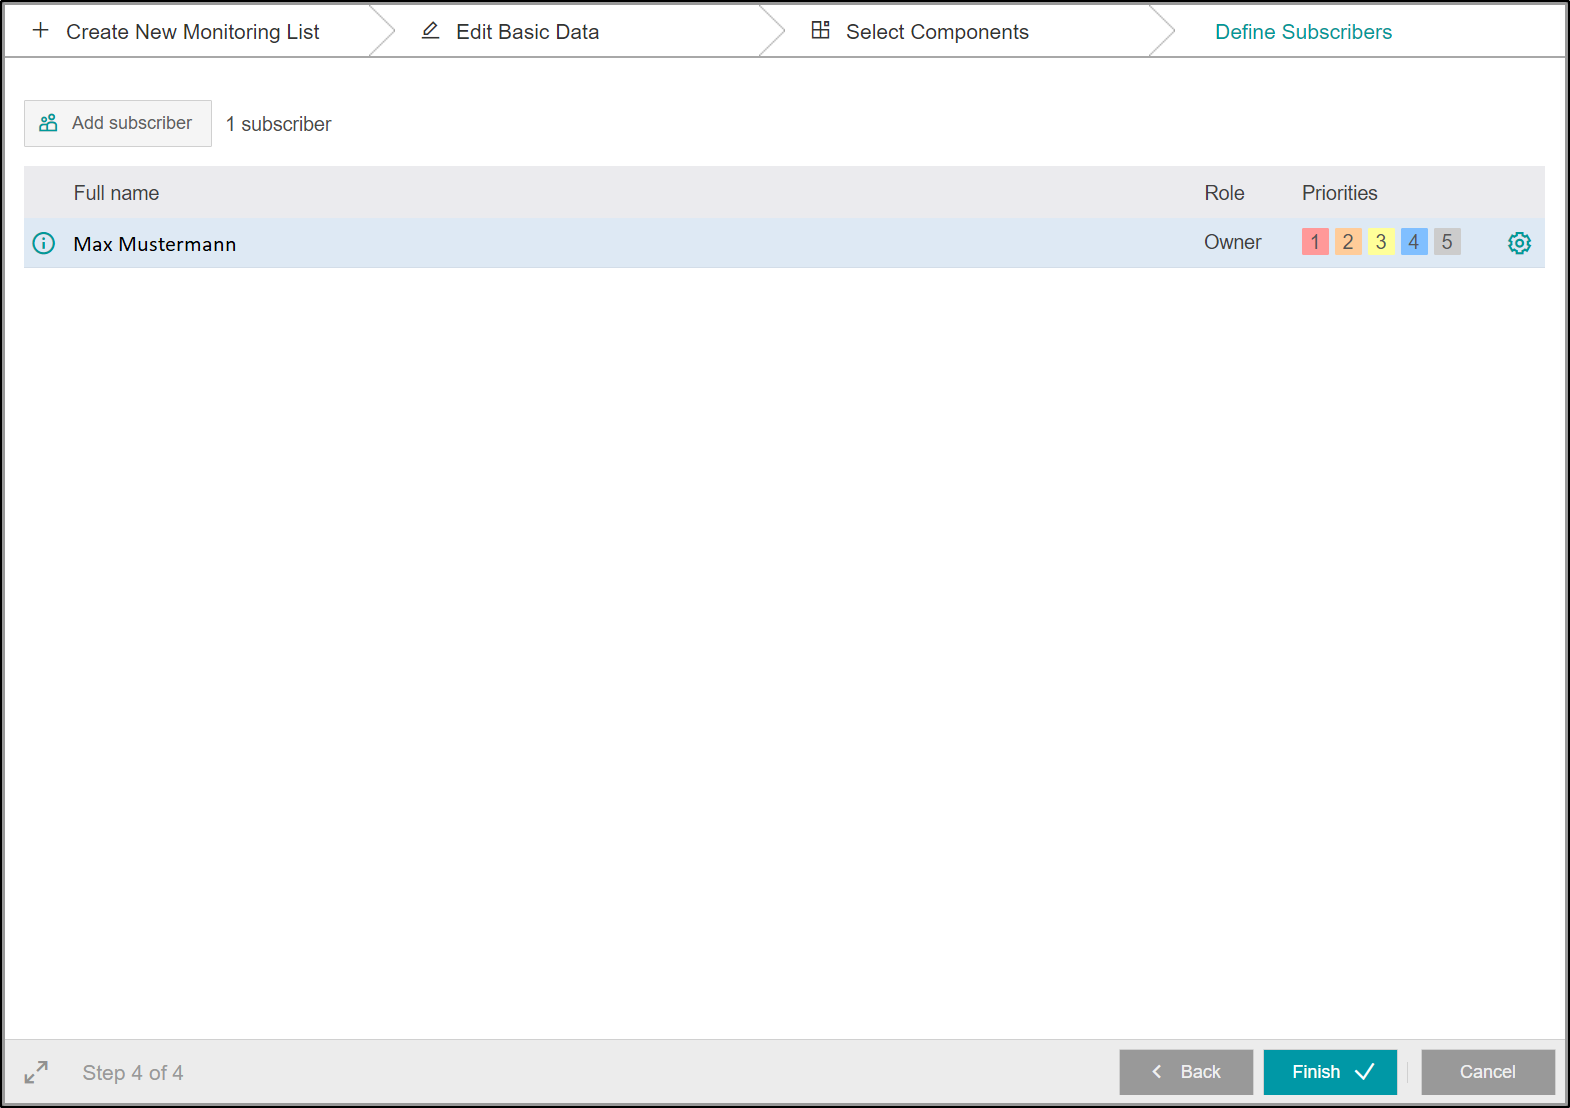
Step 3: Define Subscribers
In the next tab you can modify the subscribers of the monitoring list. Subscribers will be able to see the monitoring list within the Vilocify Portal (including its components and subscribers) and will receive notifications emails whenever a new notification is published for any component assigned to the monitoring list. The creator of the monitoring list is automatically added as a subscriber, further subscribers can be defined by clicking the "Add subscriber" button on the top left. This opens a further window, in which you can search the SCD via name, GID or email address.
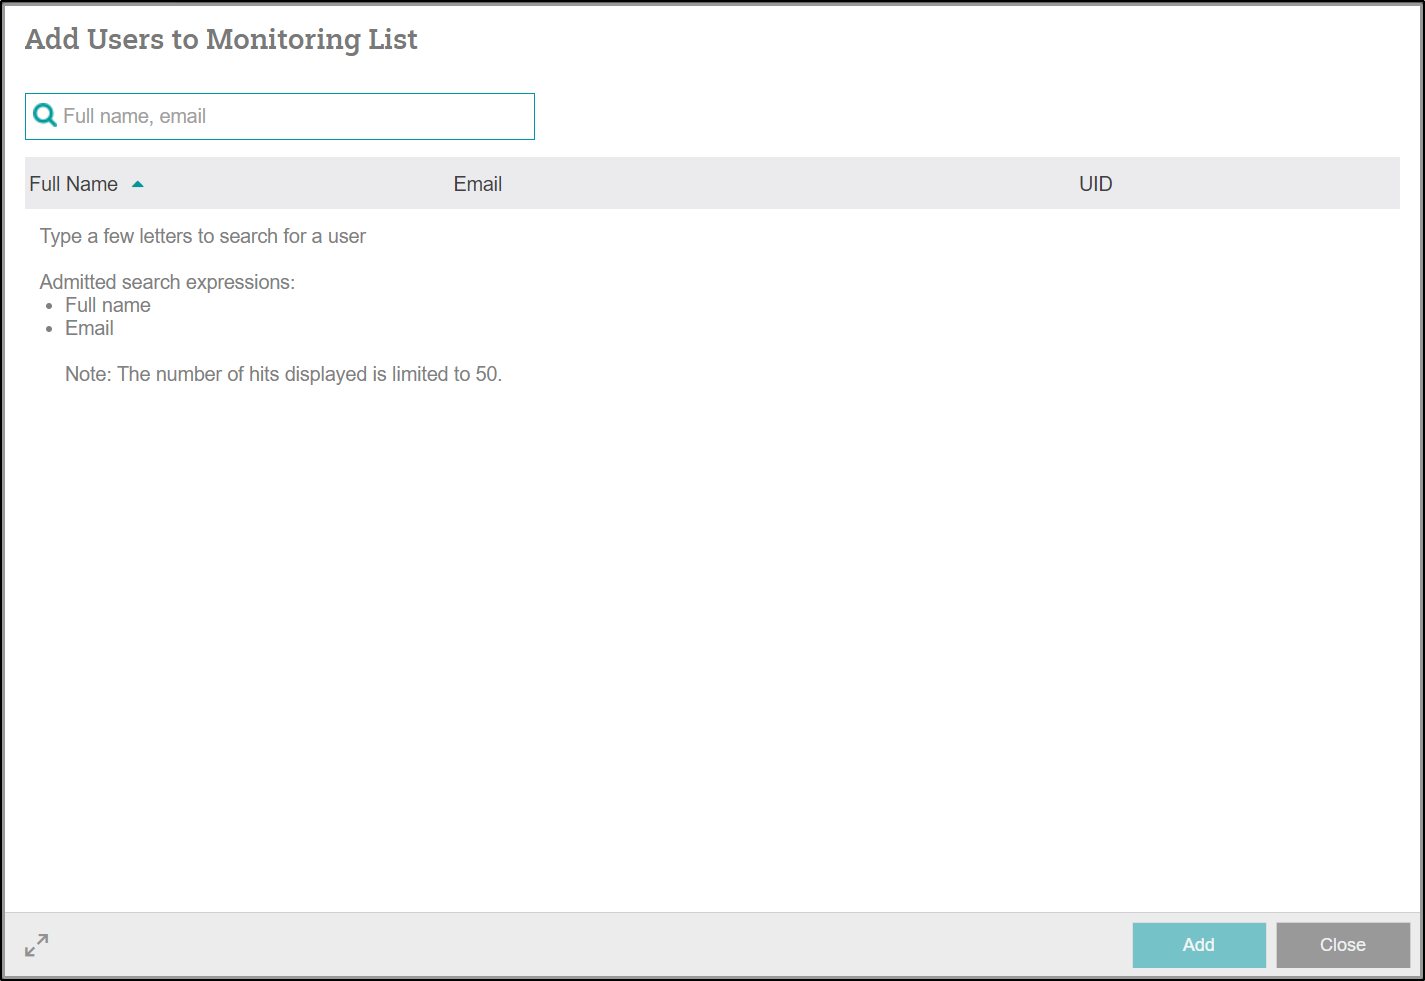
In the Add Subscriber popup, search for a user in your organization and configure two settings for them:
- Role: Subscribers with the "Owner" role are able to modify the monitoring list, i.e. they can change the basic data of a monitoring list (see step 2), the assigned components and its subscribers. Additionally, they are allowed to delete the list and add dependencies to other lists they can see. Subscribers with the "Reader" role have read-only access to the monitoring list.
- Priorities: Vilocify notifications are always assigned a priority (see corresponding page for additional information). If you wish your notifications email to contain only notifications of certain priorities, you can change this setting accordingly. Please note that changing this setting might lead to missing out on relevant security vulnerabilities.
Click the "Save" button on the bottom right of the popup window to add the new subscriber to the monitoring list.
General Remarks
- The monitoring list tab of the Vilocify Portal shows only monitoring lists you are assigned to, they are not made public. If you wish to see a monitoring list created by another user, you need to be added as a subscriber of that list. Also, organization admins can see all lists in their organization.
- Anything defined within the creation process can be changed after the creation of a monitoring list by any of its subscribers with the role "Owner". See corresponding Wiki page for additional information.
- Subscribers of a list will be notified of its creation or modification via email, only if you check the "Notify subscribers" checkbox before saving.